
Welcome to a weekly feature on my blog – Ben’s Zone. Written by husband… Ben. A foodie, coffee obsessed, ex-smoking, ex-drinking and Ridgeback loving Dad. Who is also seriously into his fitness. You can find him on the blog (mostly) on Sundays. Enjoy!
Making a Homemade Guitar Pedalboard
I’ve got my guitar cabin set up pretty perfectly right now after some time spent sound proofing but the one aspect that always annoys me is the floor. As my son and I both use pedals with our guitars from time to time the floor is always a mess of pedals and cables. The solution is a nice neat board on which to mount pedals and keep them all nice and tidy. Of course, you can buy pedalboards but, as with everything guitar related they’re pricey and also, you don’t get the fun of building them yourself. I did a bit of research and I found that there are a whole bunch of people building their own pedalboards from Ikea shelves and it seemed like that might not only be a cost-effective solution, it could also be a bit of a fun weekend project to do during lockdown. Another thing that occurred was we could personalise our pedalboards a bit if we were making them ourselves. So here’s our guide on making a homemade pedal board from Ikea shelves.
The Basic Plan
Internet research indicated a whole bunch of Ikea shelves will do the job, but I found a few nice examples of building boards from ‘Gorm’ shelves. The ‘Gorm’ comes in a 3 slat model and a 5 slat model. We want the 5 slat model. I found what I think are factory seconds which came in at £5 for the pair. Then I had to get some nice heavy-duty corner angle brackets. I decided on 6 so that I could put 3 on each board. This part is crucial and so I got reinforced ones as I don’t want the board to collapse. The basic idea is to cut 2 slats from the top of the board and use one to form a support for the board attached using the brackets (£10). Screws I have in abundance and so all I needed was some handles for the board (£6), spray paint to make it look nice (£12) and hook and loop tape to attach the pedals (not Velcro as that costs the earth) which was £10.
So at this point, we had spent £43 for 2 custom boards, which is cheaper than getting a cheap mini board off Wish.
So the idea is simple. Saw off the top 2 slats. Use the middle slat as a reinforcing piece under the board and use the top slat as a back plate. This serves to set the board at an angle, which is nice in terms of ergonomics and gives us some space under the board to put in power supplies and route cabling.
Before we started cutting we did a quick check where we laid the pedals out on the board to make sure we had space. Unsurprisingly we had loads of space (because the boards are massive). I did think about removing the side spar, cutting the slats and re-attaching but I felt it was a lot of hassle for minimal gain in terms of form factor. Not having a good bench to work on I was a bit concerned it would increase the amount of cutting and the chances of it all going wrong.
Start Choppin’
Due to my office refurb I have a bunch of old kitchen units in my workshop which has meant I have zero space. One upside was that, despite having no bench, I was able to use the unit to brace the shelves as I cut and form a nice line to guide against. The two slats came off far more cleanly and neatly than I could have hoped.
The next bit was simple. Measure the centre point of the slats and measure the central supporting spar. I did this by laying the slat on the board and simply marking a line giving it about 5mm clearance on each side. Once the slat was cut to size I attached using woodscrews for which I had tapped pilot holes. Even when using self tapping screws I drill pilot holes in soft wood as it splits so easily. I would have liked to have counter sunk these but I could not find my countersink and it’s on the bottom of the board out of sight. If you do not have screws you could use nails here, if you’re some kind of animal.
I knew attaching the brackets would be a bit crucial so I took a lot of care here. I had 3 so I turned the board over, laying the two brackets in the corner and lining them up by pressing the remaining bracket against them so that they were exactly on the edge. Again, I drilled pilot holes to make sure the wood did not split and screwed them in.
Attaching the rear slat was comparitively easy. I attached one screw of one bracket by eye and then simply measured the distance from the base of the board to the end of the slat. I then got my assistant to hold the tape measure in place while I put a screw into the bracket on the other side. This bit I did try and get right as there’s nothing worse than a wobbly pedal board.
With the side brackets fully attached all that was left to do for main construction was to attach a third bracket in the middle. This was easy as the rear slat was already in place.

Almost Ready
To say the next stage is mainly cosmetic is not to say it was simple. We had decided to make the boards black, first to hide the imperfections of the shelves and second so that they don’t stand out on a stage (which I am sure the boy will appreciate at some time) so we got some general purpose gloss black spray paint. We should have probably gone matt really but it needed to be just a little bit fabulous. To make sure there was a good key for the paint we used a detail sander with 120 grit paper to roughen the surface and then we got painting. Suffice to say we had some fun though I do wonder if I have created a future graffiti artist as Logan seemed to be having just a bit too much fun.
Once the boards were assembled the only jobs remaining were to install handles on either side so they can be carried easily and then attach the (not) velcro. The (not) velcro (loop side) goes along the slats. To do this I roughened the surface underneath a bit with a piece of sand paper, just to help it stick well. After this the last bit of the board was to attach the pedal power supply. I did this underneath and on the right hand side of the board using Command Strips. Command strips are like velcro from a dystopian future, they hold brilliantly, work for a ton of applications and are easy to use, unfortunately, they are a bit pricey. An alternative would be to drill holes through the slats and thread zip ties through but I felt that the command strips were better aesthetically.
With the board ready to go I then set about mutilating the bottom of my pedals to remove the feet they came with so I can attach the hook side of the (not) velcro allowing me to stick the pedals where I like on the board, as long as where I like happens to be on the top where I had put the loop side of the velcro. And, shazam, it’s all done, at least that’s what I thought. Once we’d set Logan’s up all neatly with the pedals on and the power cables all tidy it struck me that it could be made messy again easily with the cables to and from the amp. To this end I put 3 large holes (with a hole saw) and one about 5mm diameter in the back board. The 3 big holes (10mm ish) are to allow the cabling from the effects loop in and out of the board while routing underneath and one back to the amp. The smaller 5mm hole is for the power into the pedal power supply. I was truly cursing myself for not having done this sooner as it was a mare of a job with the board assembled and meant I had to re-paint where I’d drilled. If I was building another board I’d have done this prior to attaching the back plate to the brackets. Still, live and learn.
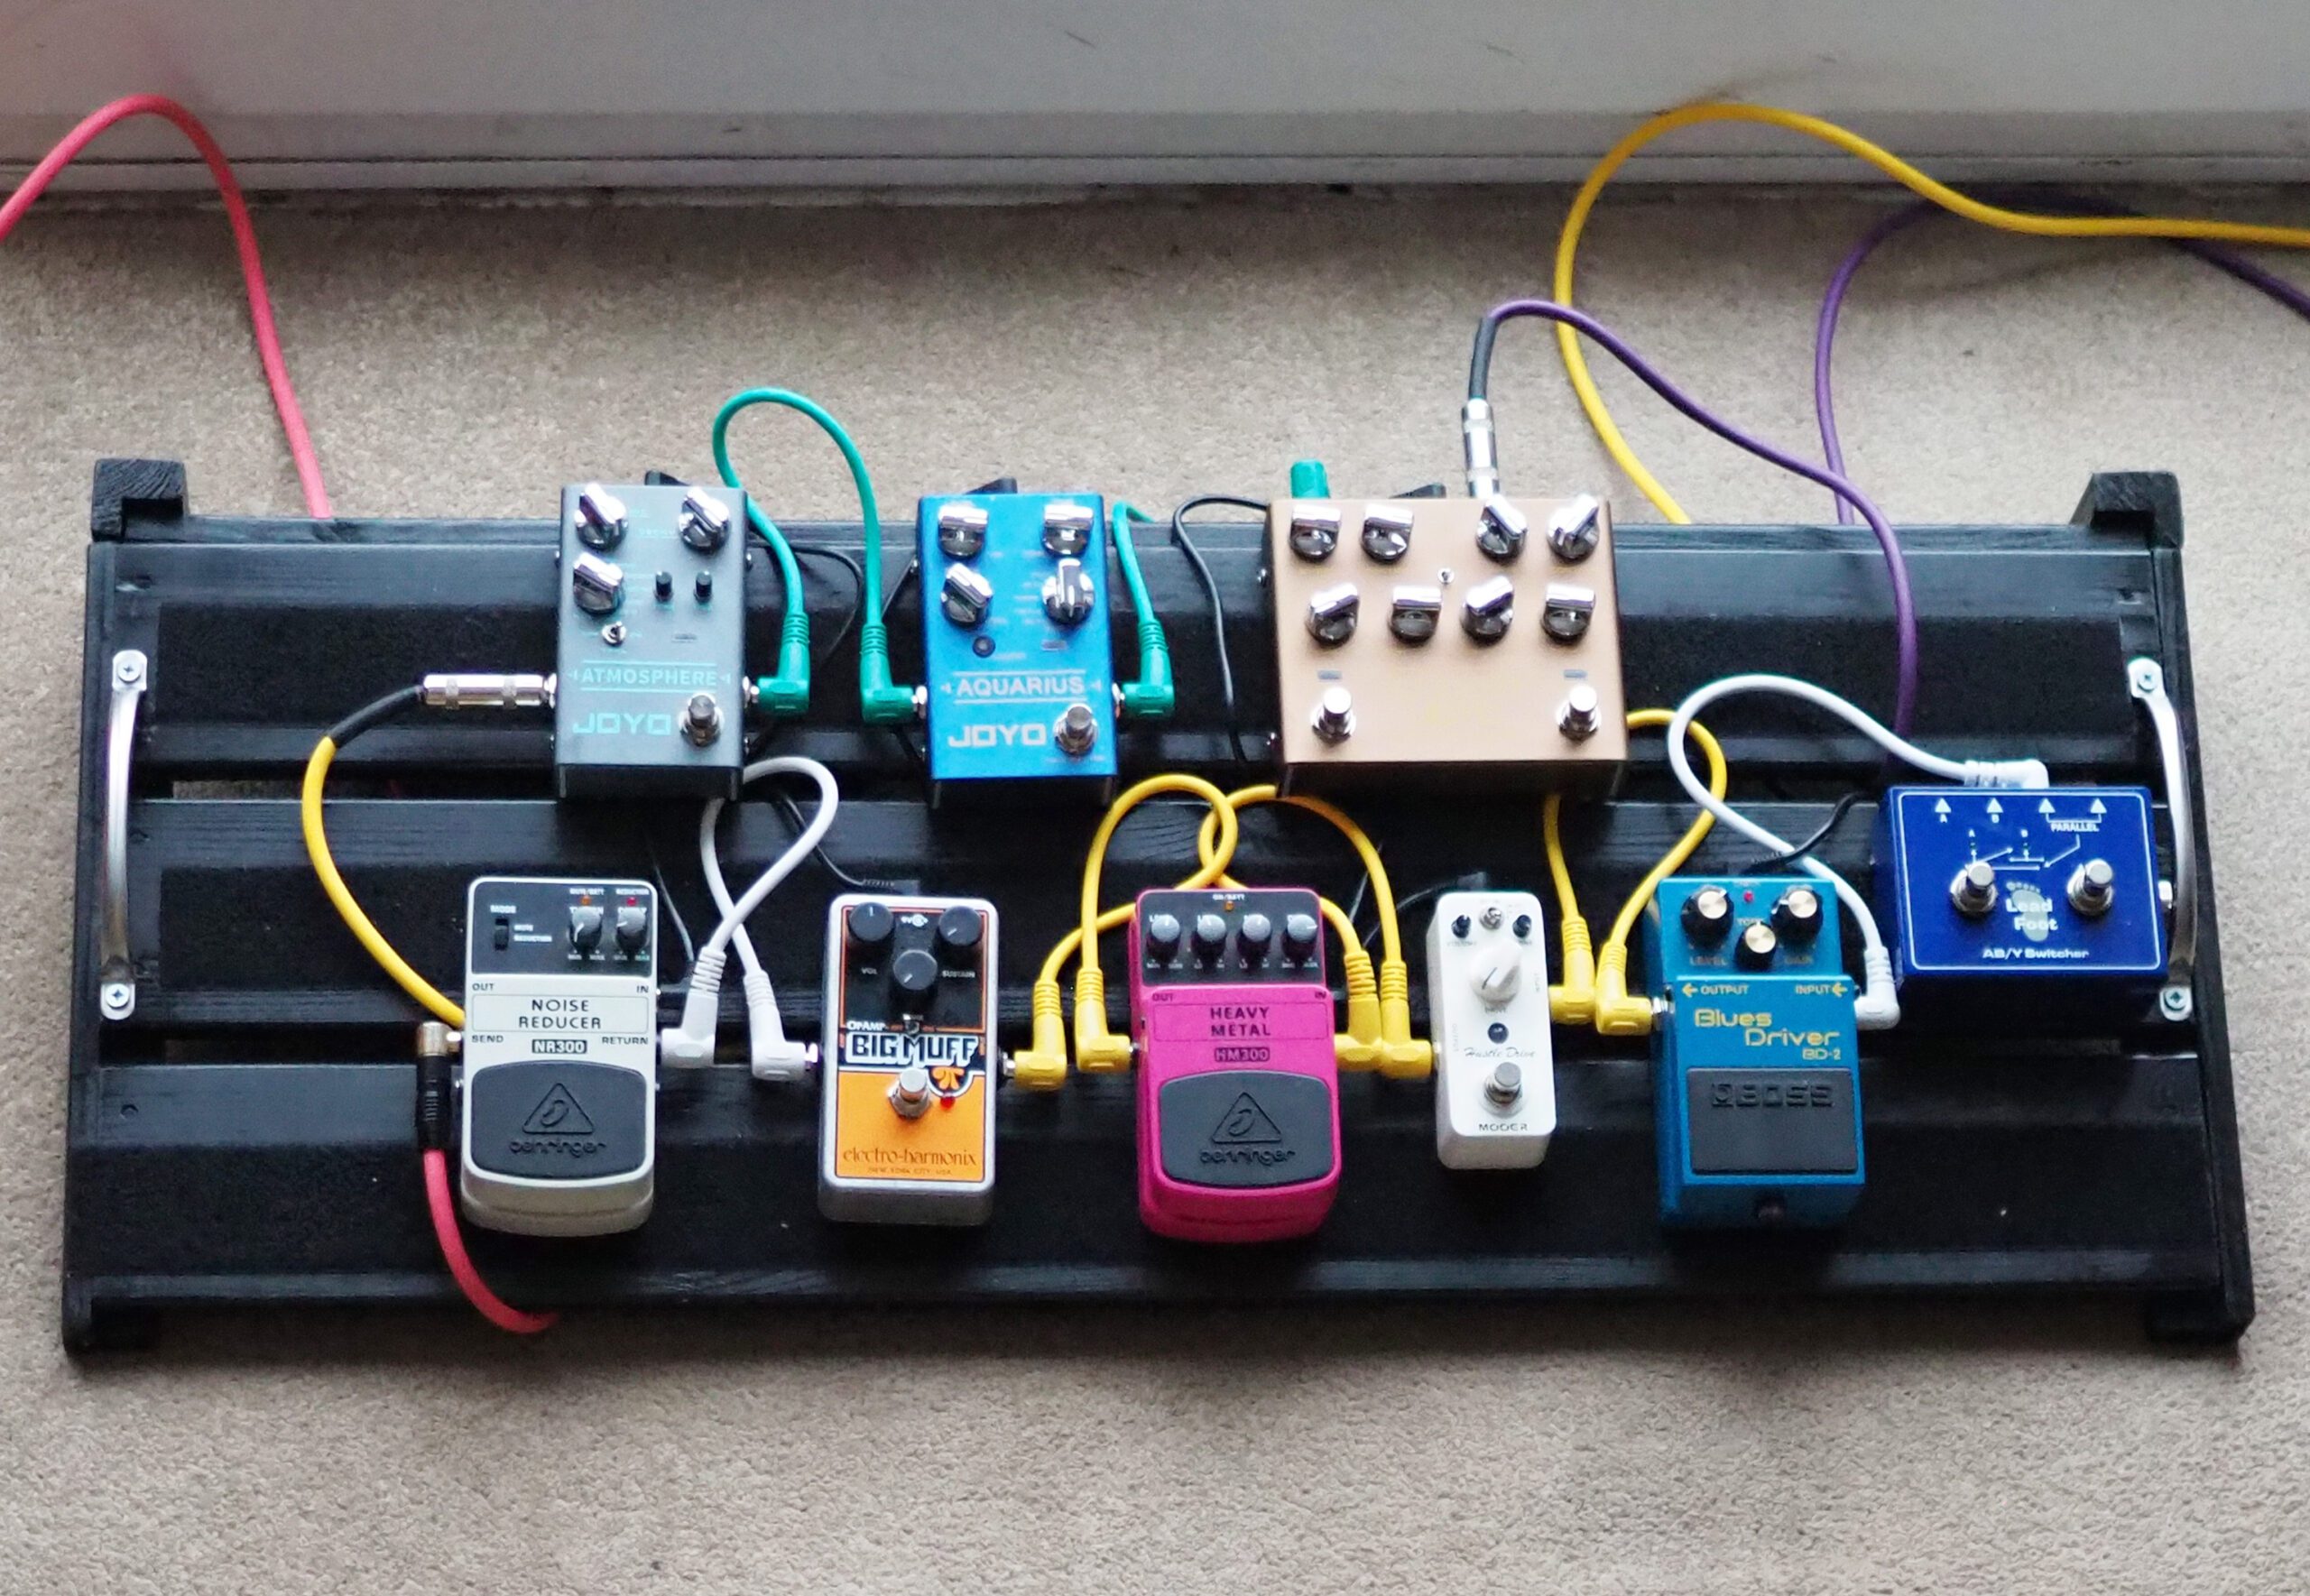
Here is what mine looks like:
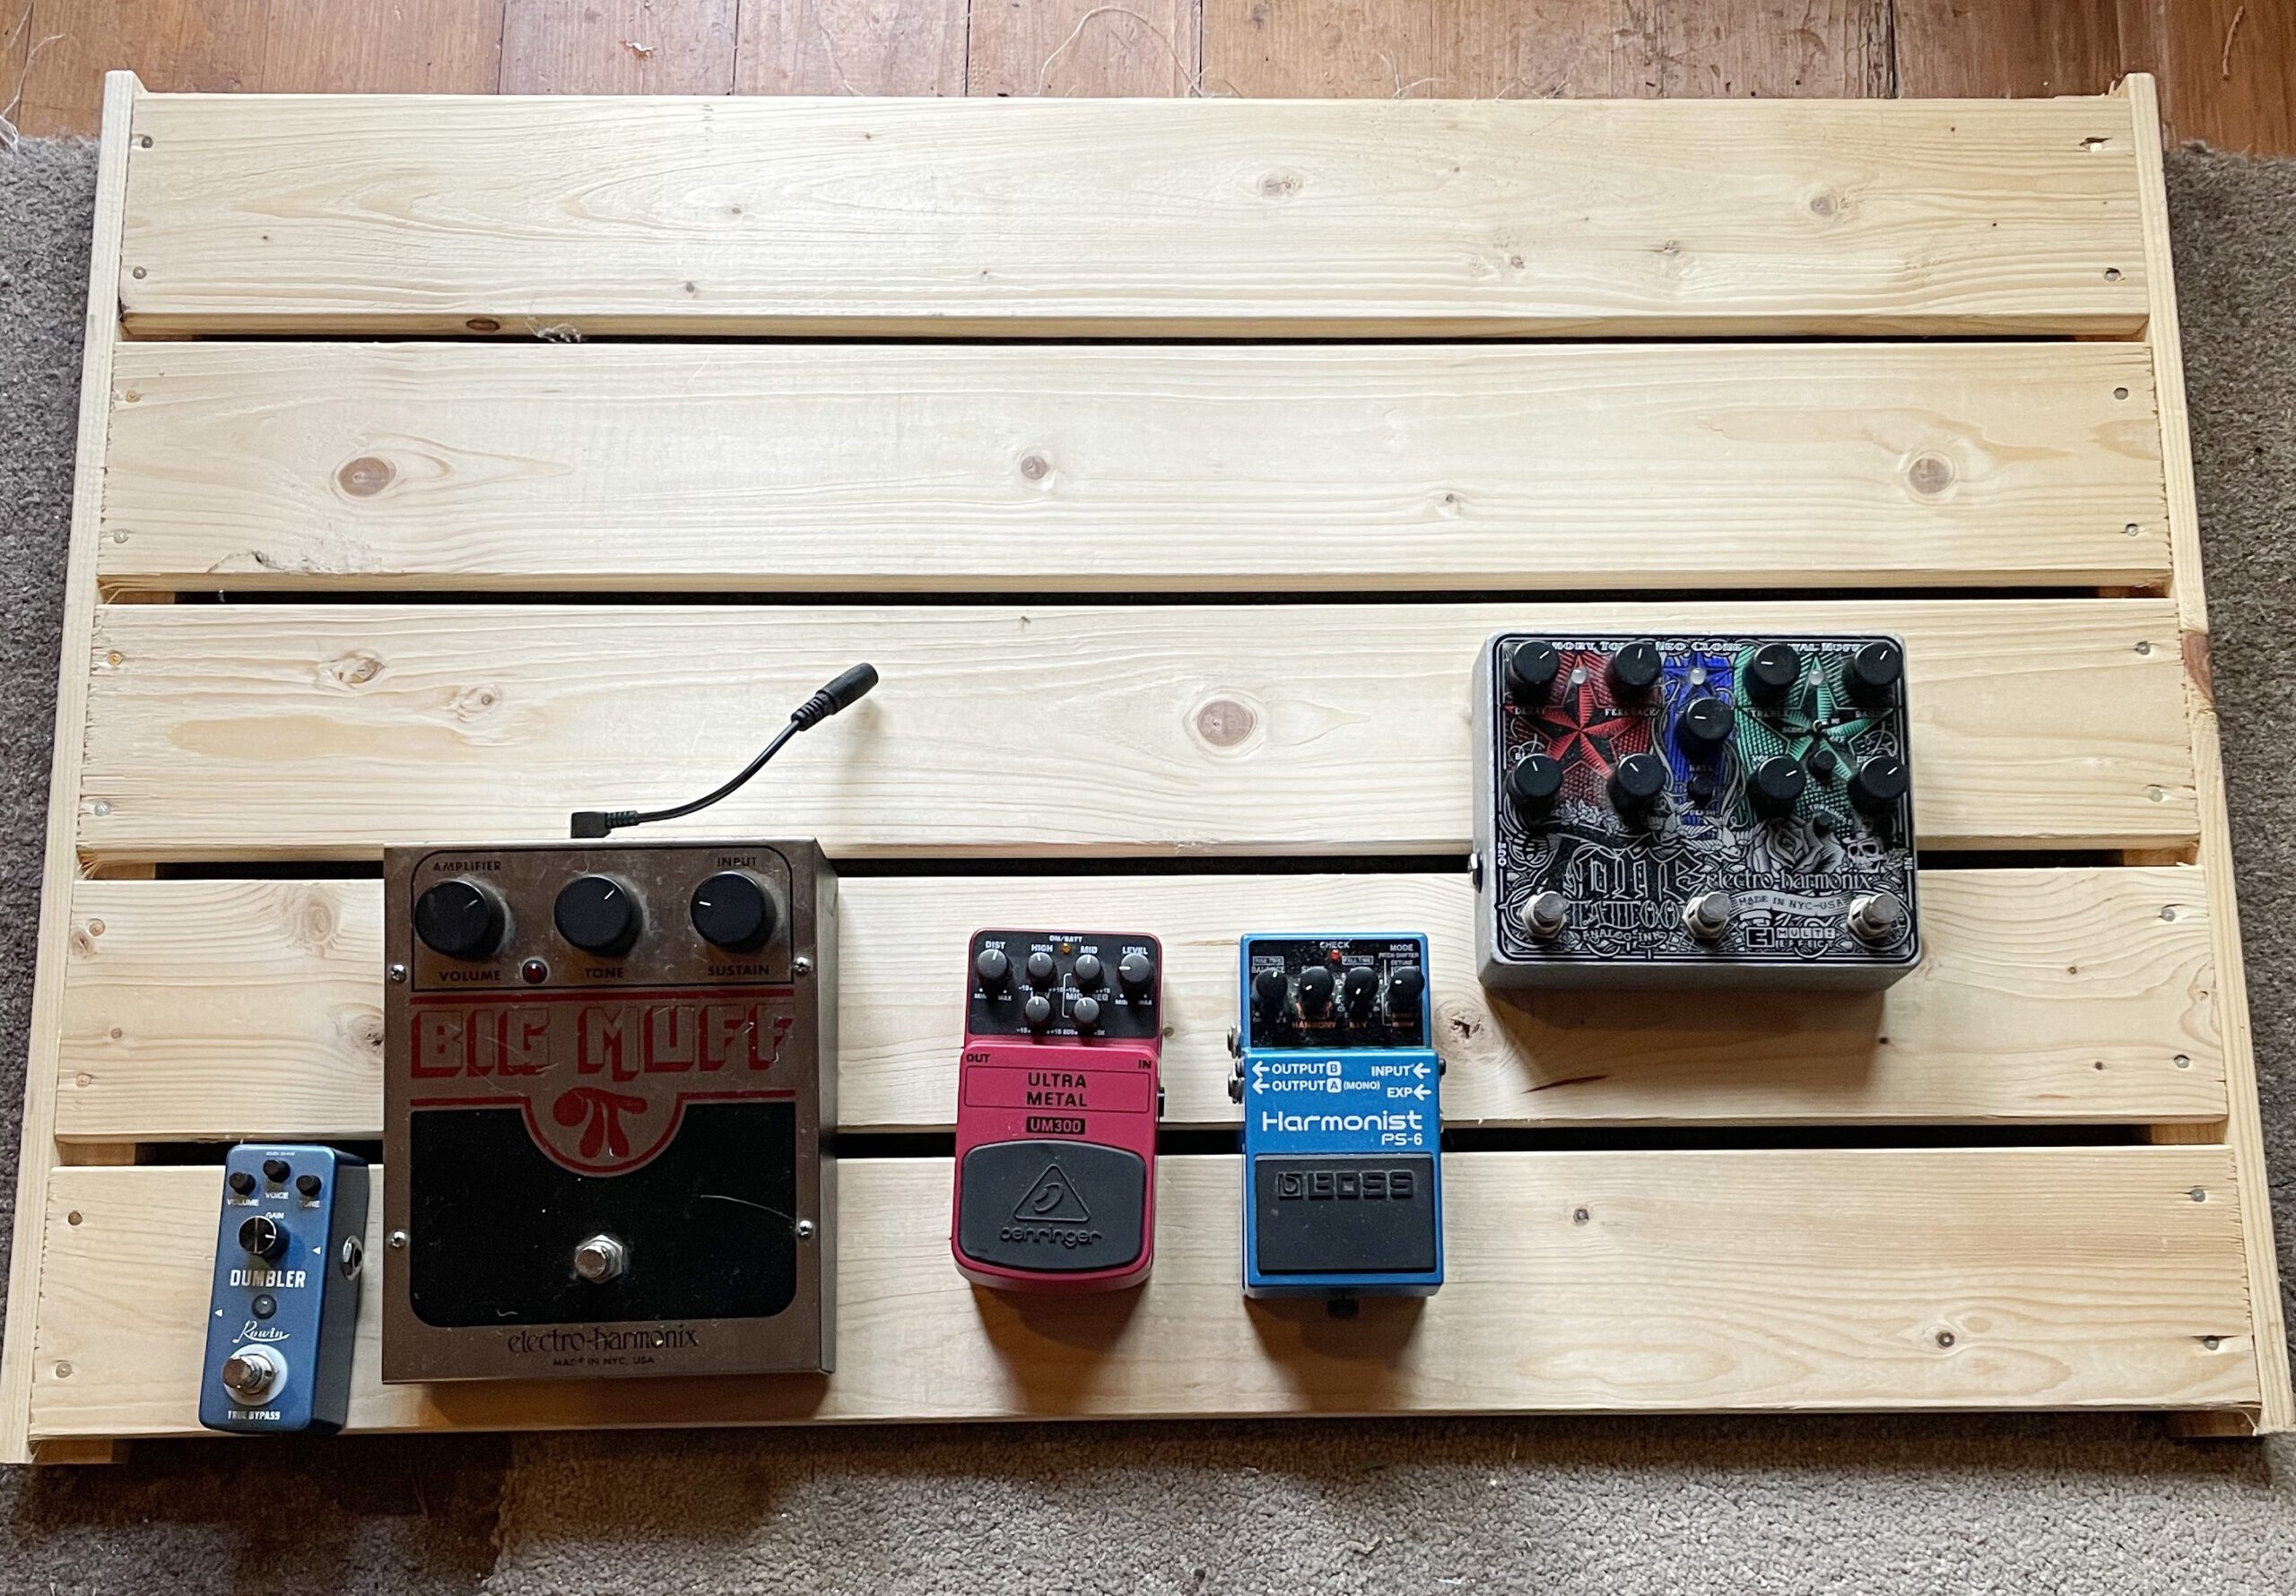
And here is Logan’s:

Total cost then, £43 plus let’s say a fiver for the Command Hooks we used. Not a bad deal and, moreover, it was a load of fun.